
WordPress 6.5 arrived in April, and the headline feature is a Font Library. This allows you to manage fonts in a similar way to how you manage images in the Media Library.
Using the Font Library, you can install local fonts and Google Fonts. You can also apply them to different parts of your site design, such as the headings, text, and links.
In this guide, we’ll show you how to use the Font Library.
Table of Contents for this post
What Themes Support the Font Library?
We’ll use the Twenty Twenty-Four theme in this guide. If you want to follow along, you’ll need a theme that supports the new Site Editor in WordPress. Not all themes support the Site Editor yet. You can check to see if your theme supports the Site Editor by looking for the “Editor” link in the “Appearance” area of the WordPress admin menu.
How to Use the Font Library
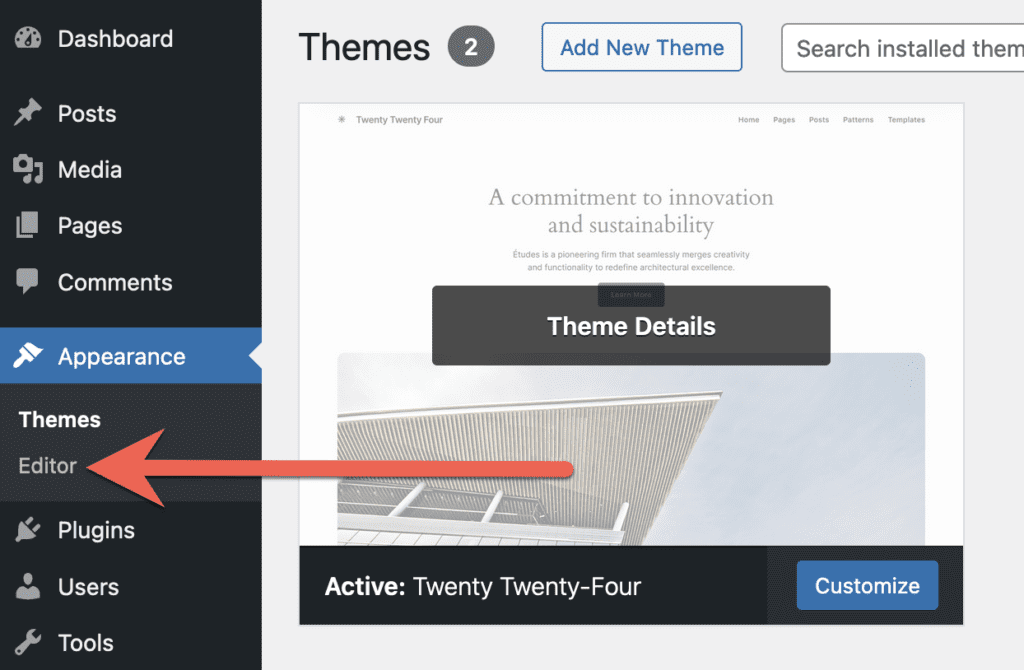
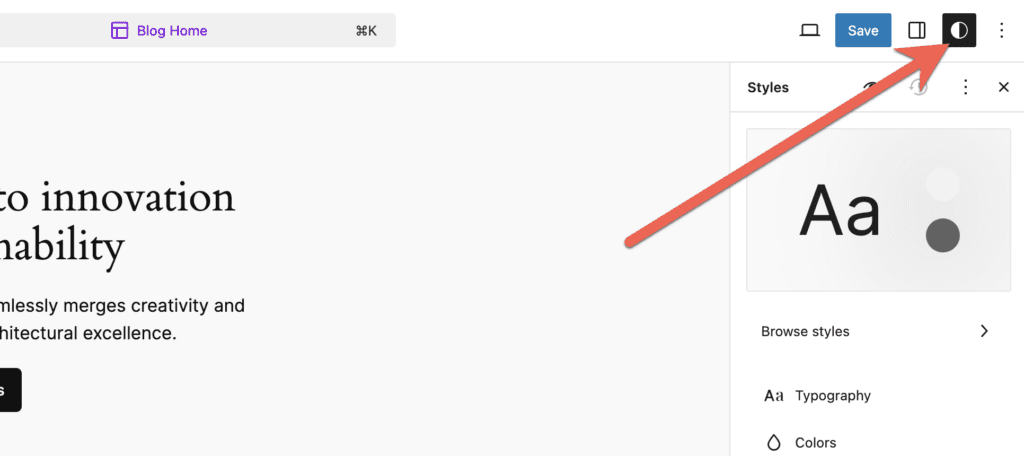
To access the Font Library, start by going to the Site Editor. Go to “Appearance”, then “Editor” in the WordPress admin menu. In the right sidebar, click the “Styles” button in the top-right corner, as in the image below:
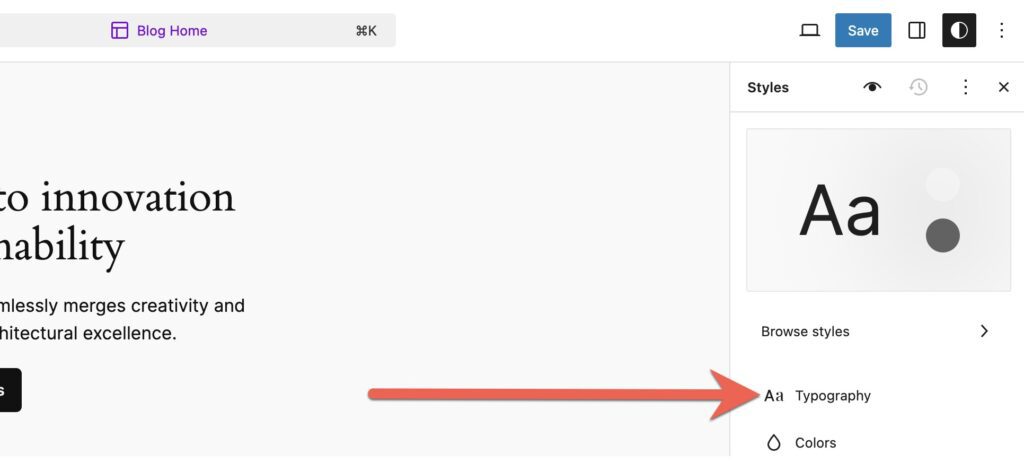
Click the “Typography” link in the “Styles” sidebar, as in this screenshot:
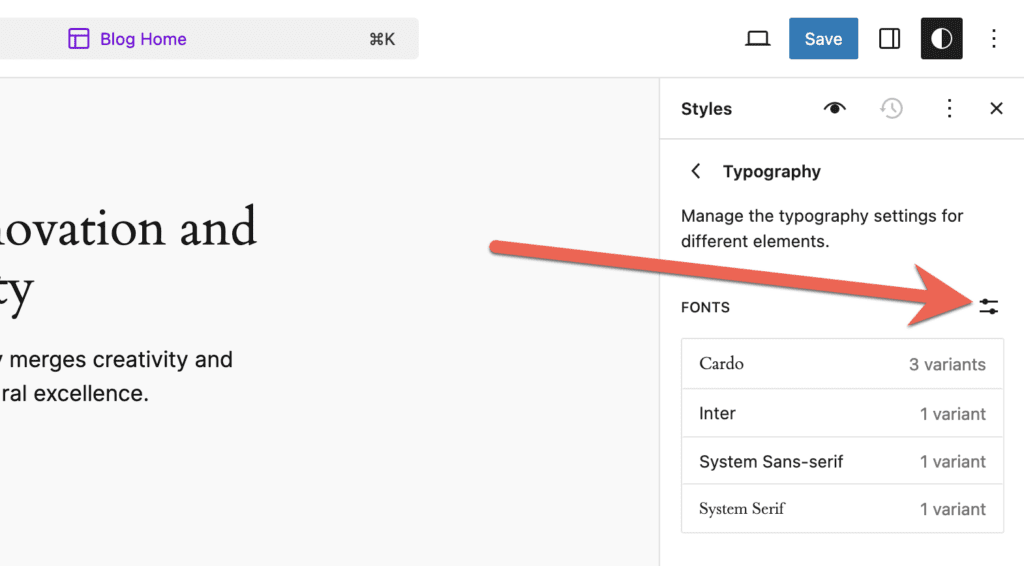
Look for the “Manage Fonts” icon that is in this next screenshot. Clicking this icon will open the Font Library.
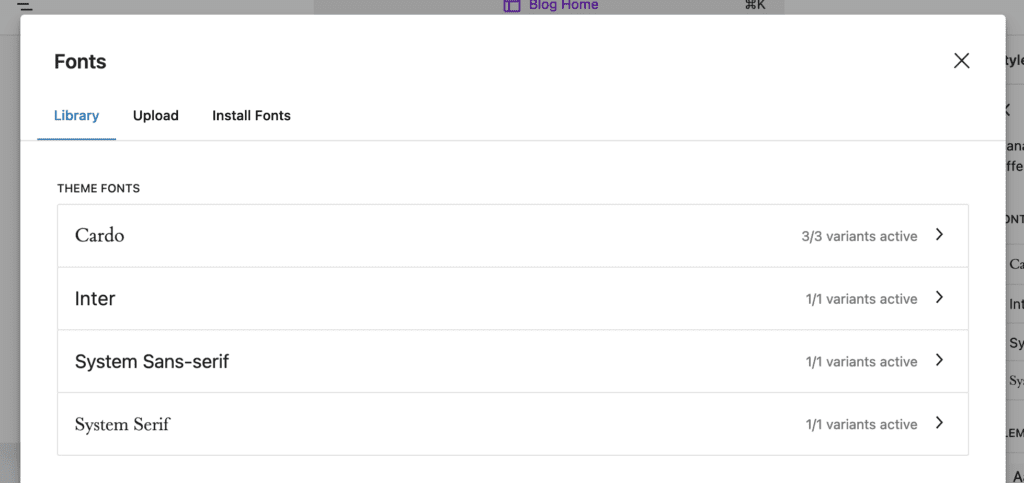
On the Font Library screen, you’ll see three tabs: “Library”, “Upload”, and “Install Fonts”.
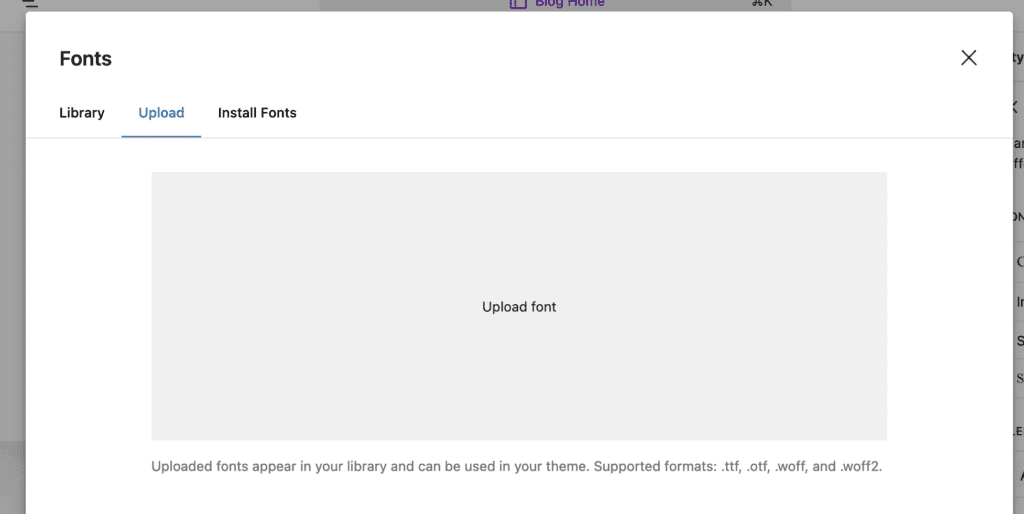
The “Upload” tab allows you to upload fonts from your desktop. The supported file formats are .ttf, .otf, .woff, and .woff2.
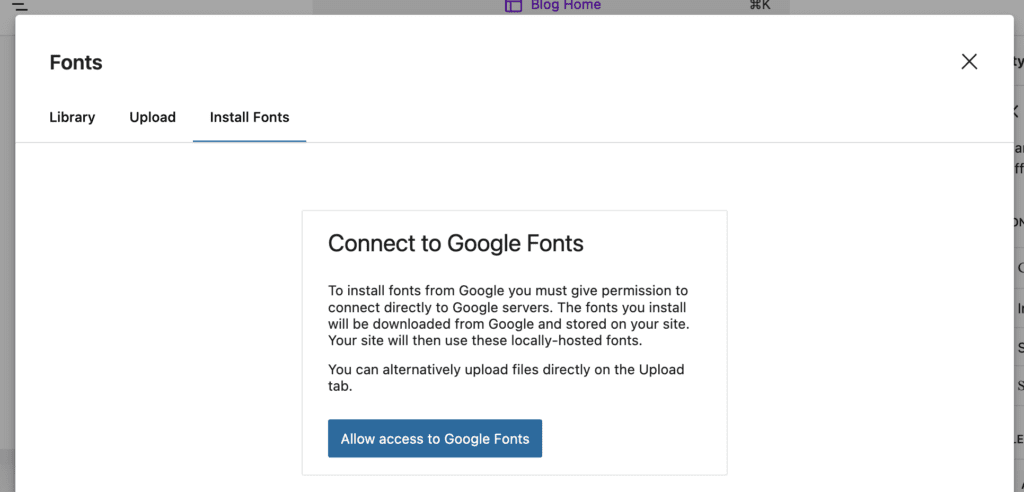
The “Install Fonts” tab allows you to choose fonts from Google’s official selection. This option doesn’t have any privacy concerns because the fonts will be added to your WordPress site and will never touch Google’s servers. The actual font files will be imported to your site and added to the /wp-content/uploads/fonts/ folder.
You do need to give permission for this feature by clicking the “Allow access to Google Fonts” button.
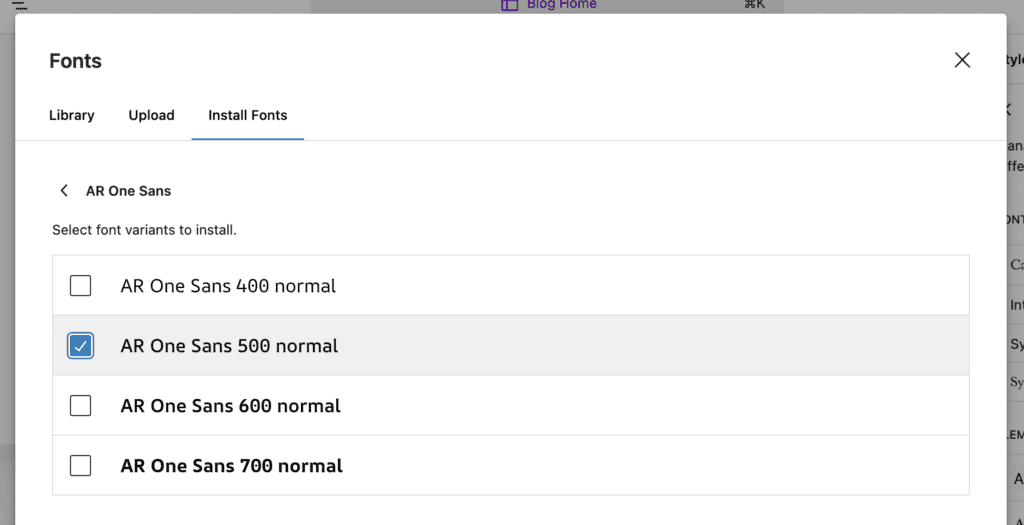
After giving access to Google Fonts, you can browse through 100’s of fonts. Using the “Category” dropdown, you can select from Sans Serif, Display, Serif, Handwriting, and Monospace categories.
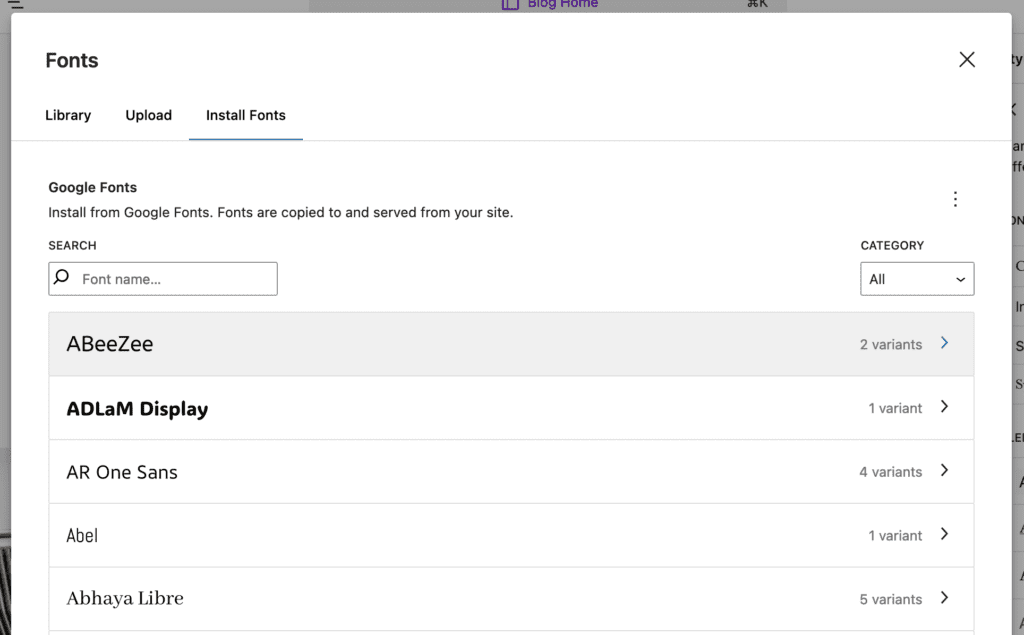
Most fonts will have variants. Choose a specific variant and click the “Install” button.
How to Use Installed Fonts
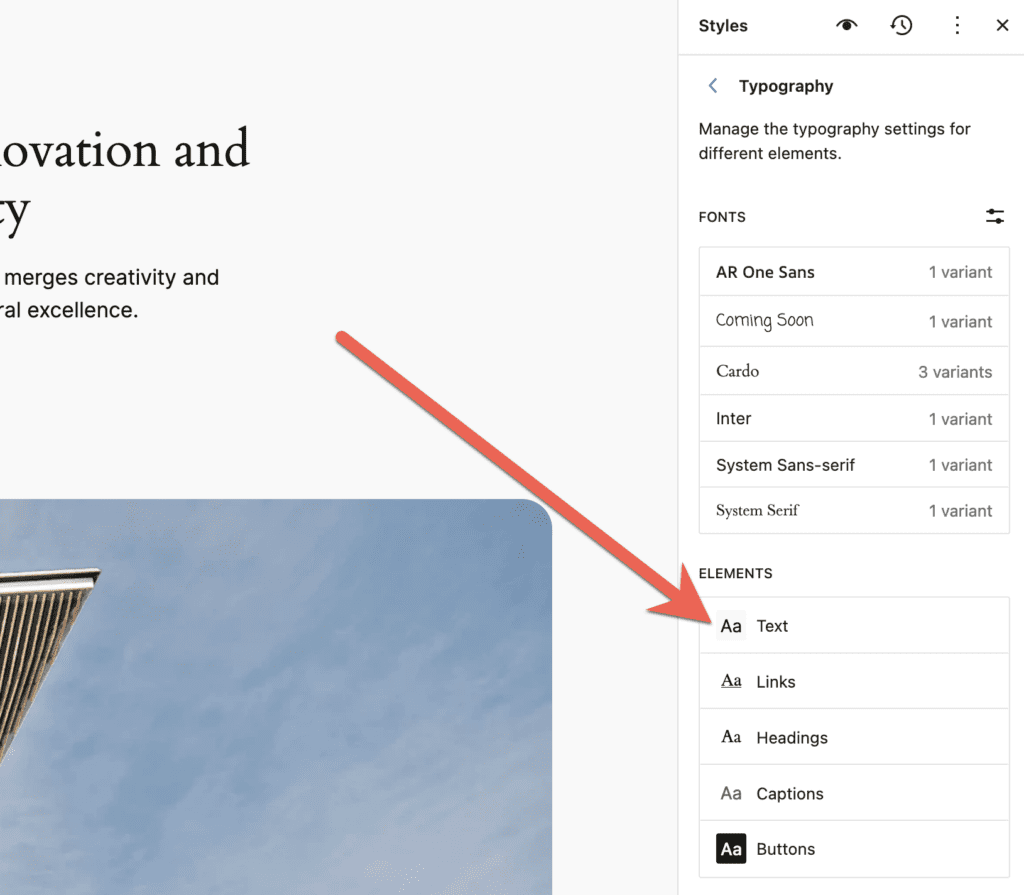
After you’ve installed a new font, you can use it from inside the “Typography” screen. Click on any item in the “Elements” area. For example, in this screenshot below, we’re going to change the font for the site’s text.
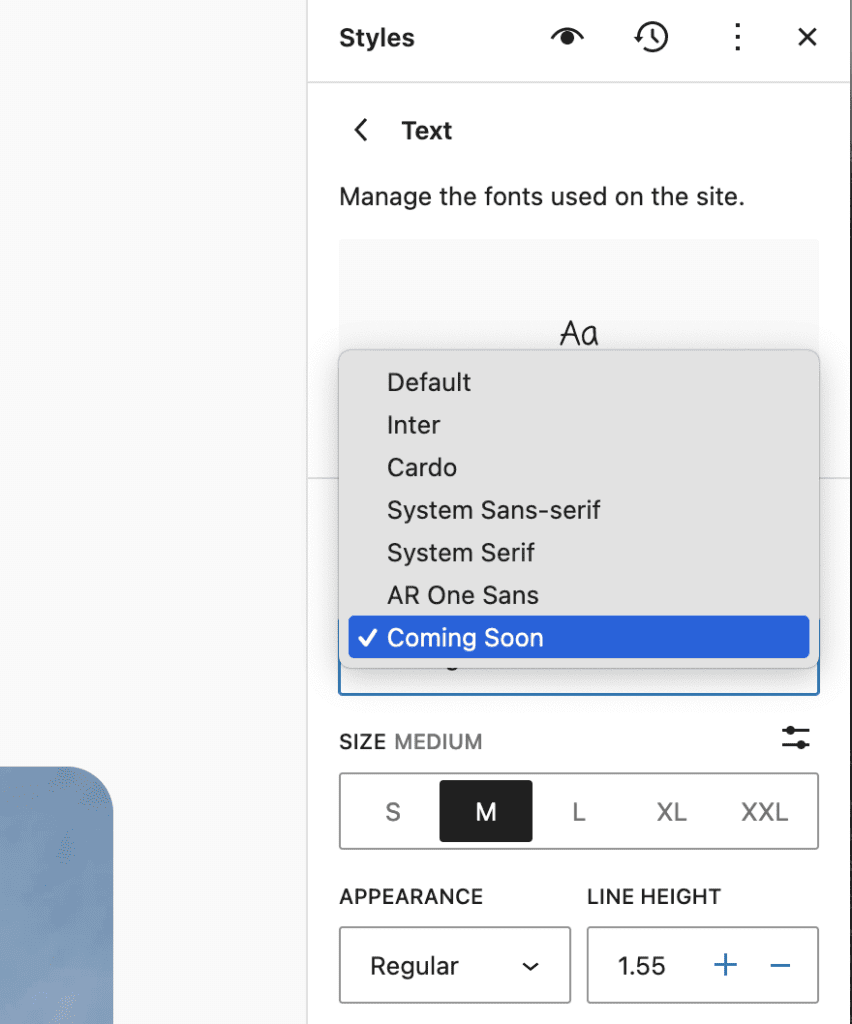
After choosing the text element, we now see a list of the installed fonts. You can use the dropdown menu to select the font you want to use. You can also choose the line height, case, spacing and more.
Font Library Summary
The Site Editor in WordPress is quickly improving and there are more and more reasons to move to a modern block-based theme. In recent months, we’ve covered the addition of a new lightbox, Openverse integration and more. The Font Library is one of the best new features in the Site Editor.
If you’re using MetaSlider, you have been able to use Google Fonts for some time already.
Hopefully in the future the new Font Library feature will be available for plugins and when it is we’ll look into supporting it in MetaSlider.