We had a request from a MetaSlider user this week. They wanted to add menu links, or buttons, on top of their slideshow. If you use the Layer Slides feature in MetaSlider, you can add menu links and buttons to individual slides. However, in this situation, the user wanted the same elements appearing over the top of every slide.
This is possible with MetaSlider and a third-party plugin. In this guide, I’ll show you how to add elements on top of your MetaSlider slideshow.
In this screenshot below, I’ve added a full-width slideshow to the site. This is a guide to creating full-width sliders. This slideshow touches the corner of the screen on both sides.

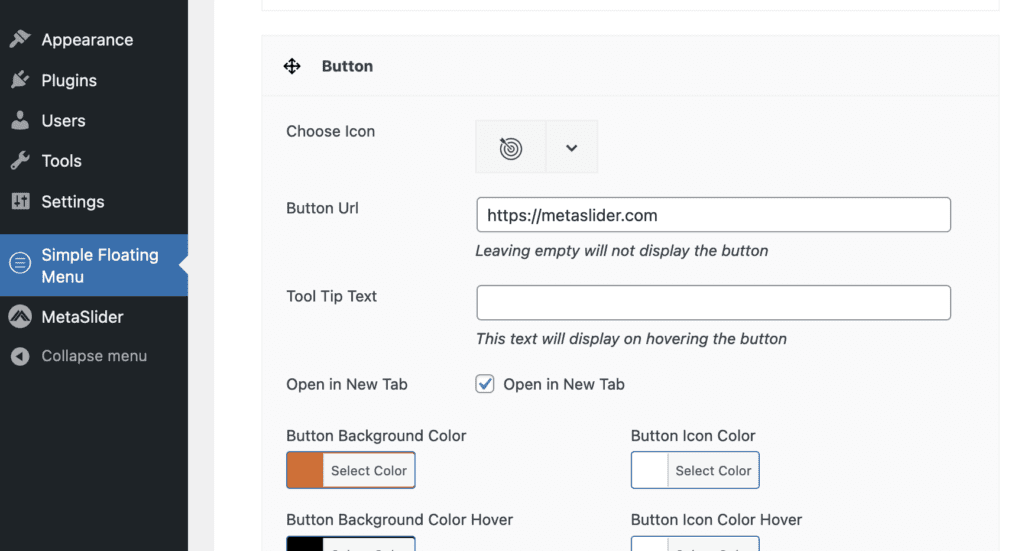
Next, we’ll use a plugin to create the elements that will go over the slideshow. In this example, I’m using the Simple Floating Menu plugin. This plugin allows you to create a menu of linked icons. In this screenshot below, I’ve chosen a bullseye icon and the link is going to MetaSlider.com. I was also able to customize the colors of the icon.

This plugin has a wide range of icons available, including options from Ico Font, Font Awesome, Essential Icon, Material Icon, and Elegant Icon.
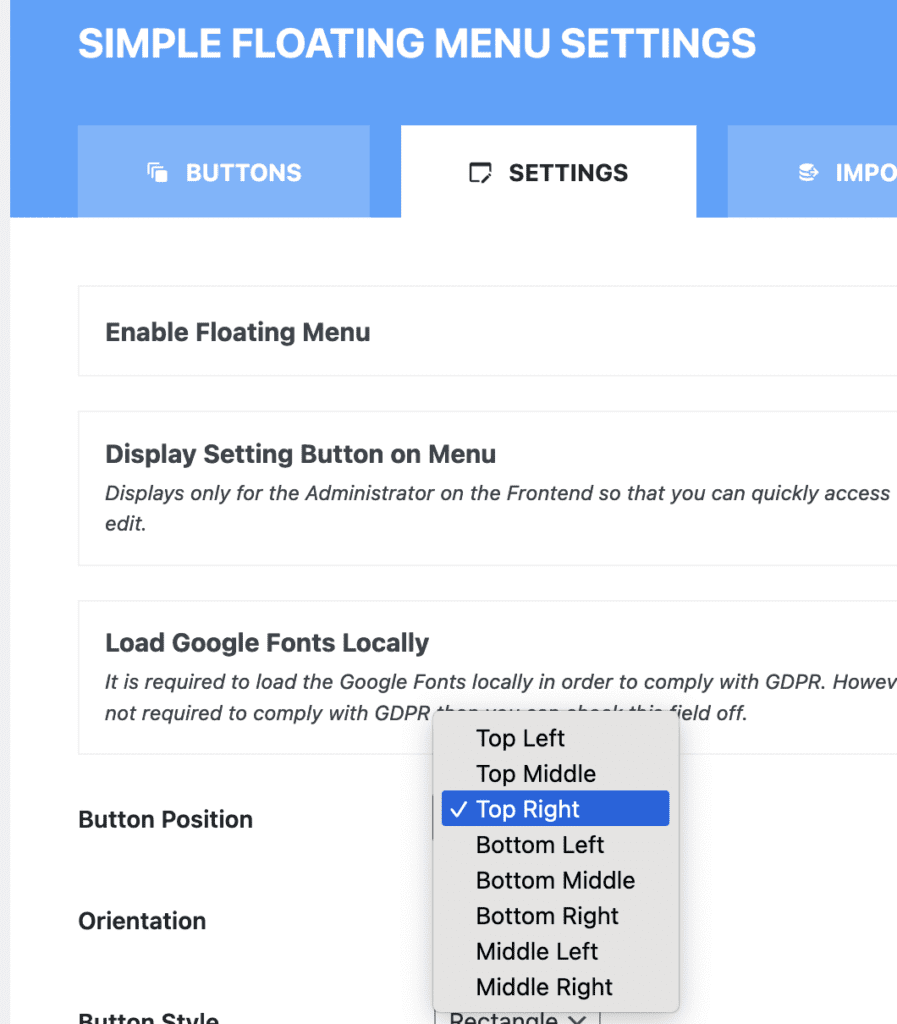
Click on the “Settings” tab and you’ll be able to choose the position of the menu. In this screenshot below, I’m choosing the “Top Right” position. I’ve also set the “Floating Menu Top Offset” to 20px.
On the frontend of the site, these buttons will now sit on top of the slideshow. Visitors can click these icons and go to the URLs you have chosen.

