MetaSlider has support for many types of video slideshows. You can host videos in your site’s media library. You can also use third party services such as YouTube and Vimeo.
However, some MetaSlider customers prefer to use their own video hosting. This is possible with the External Video feature. These videos are hosted on another service such as Amazon S3. These slides will display your MP4, WebM, and MOV videos. You can add features such as auto play, mute, lazy load, the ability to hide controls, and much more.
This week, one MetaSlider customer asked us for recommendations on where to host their external videos. In this post, we’ll give you four suggestions. There are many other good options available, but these are four that we’ve seen used successfully with MetaSlider.
Table of Contents for this post
Video Hosting Recommendation #1: Amazon S3
Amazon’s S3 (Simple Storage Service) is the default option for online storage. S3 is a great choice for storing and sharing files. It’s super reliable, and it’s also very fast, so your slideshows will load quickly. Plus, you only pay for what you use, so there’s no required monthly subscription. S3 is perfect for storing things like images and videos for slideshows.
- Log in to your Amazon S3 account.
- Create a new bucket for your website videos.
- Upload a new video into your bucket.
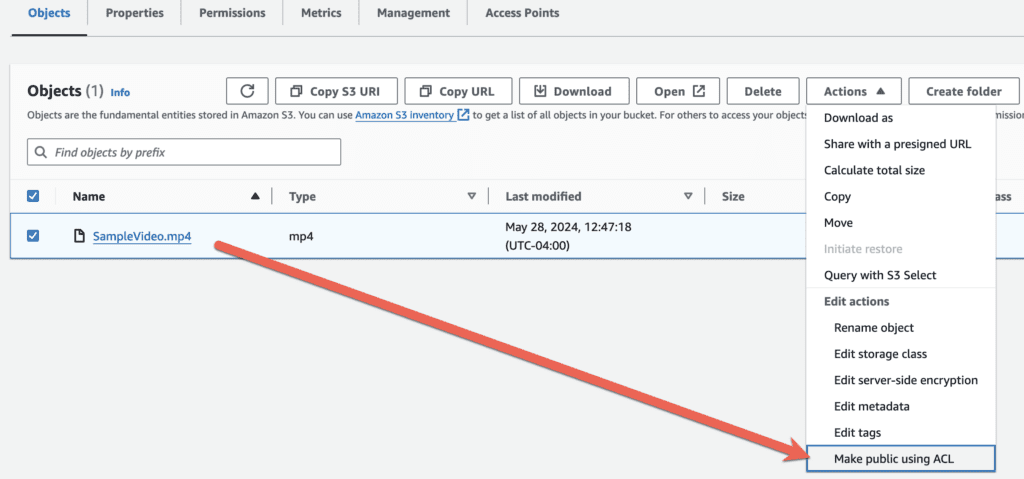
- Make sure the permissions are set so the public can view the video. This may require a little digging into the Amazon settings, which are often controlled at the bucket level. It’s beyond the scope of this guide to dive too deeply in S3 permissions, but there are a lot of good tutorials online. In the screenshot below, I’m using the option, “Make public using ACL”.
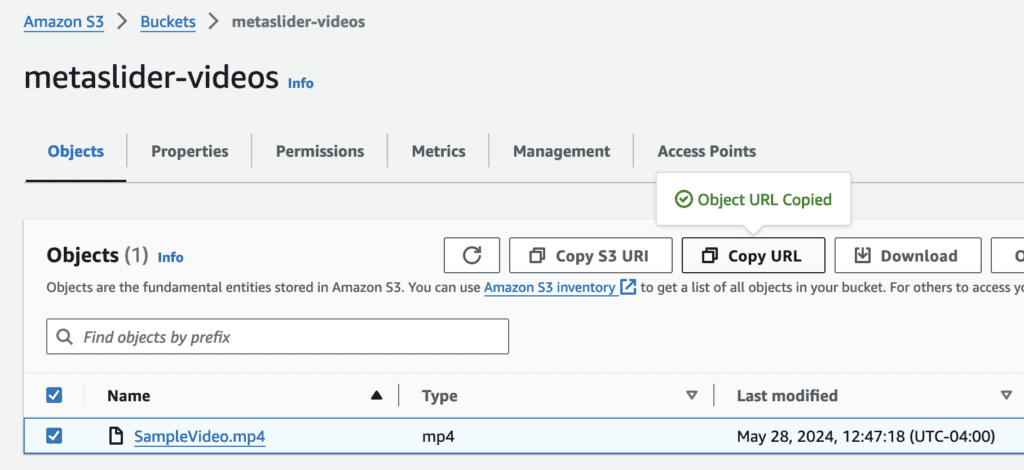
- Click the “Copy URL” button to get the URL for your video. The URL will look like this: https://yourfoldername.s3.amazonaws.com.
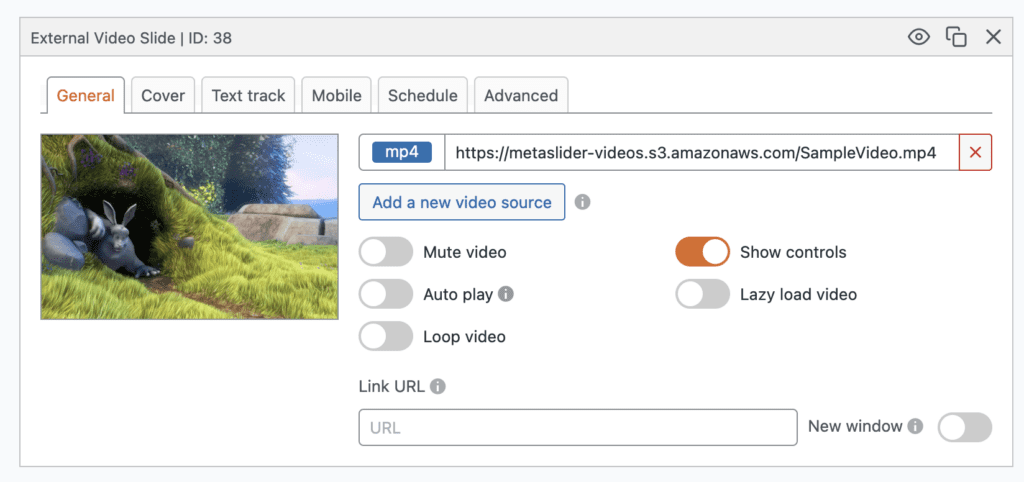
- You can now add the Amazon S3 URL to your MetaSlider slideshow, as in this screenshot below:
Video Hosting Recommendation #2: Google Cloud Storage
Google Cloud Storage is the option that we use for our slideshow demos that you can load from the “Quick Start” screen in the MetaSlider plugin. It provides fast and reliable streaming, ensuring videos play smoothly without buffering. The service also automatically adjusts video quality based on the viewer’s internet speed, enhancing the viewing experience.
- Log in to your Google Cloud account.
- Create a new bucket for your website videos.
- Upload a new video into your bucket.
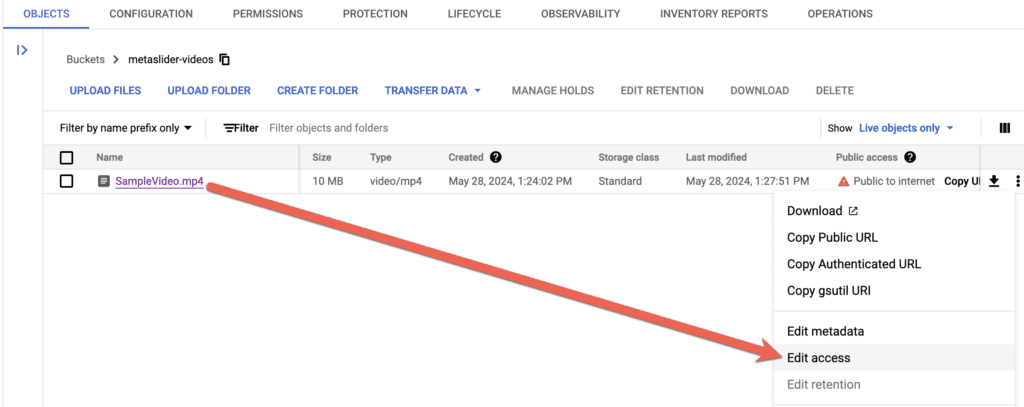
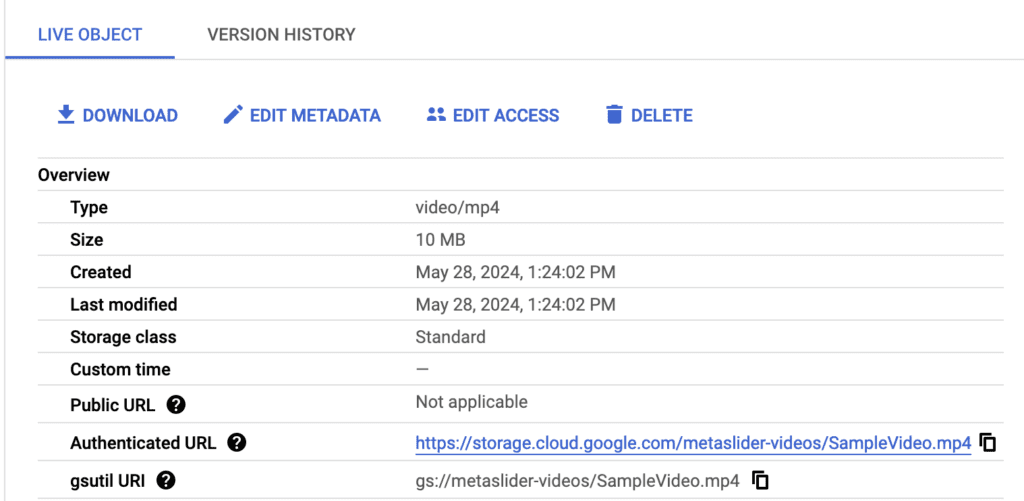
- Make sure the permissions are set so the public can view the video. This may require a little digging into the Amazon settings, which are often controlled at the bucket level. It’s beyond the scope of this guide to dive too deeply in S3 permissions, but there are a lot of good tutorials online. In the screenshot below, I’m using the option, “Edit access”.
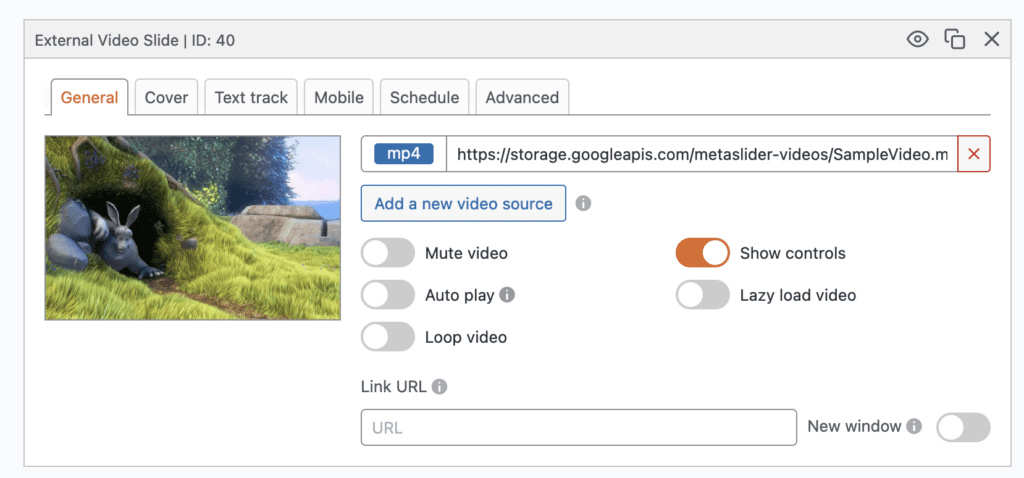
- Copy the URL of your video. The URL will look like this: https://storage.googleapis.com/yourfoldername/yourvideoname
- You can now add the Google URL to your MetaSlider slideshow, as in this screenshot below:
Video Hosting Recommendation #3: Microsoft Azure Blob Storage
Microsoft Azure is fast and reliable, ensuring smooth video playback without interruptions. Additionally, it offers easy integration with other Microsoft tools, which make it simple to manage and share your videos.
- Log in to your Microsoft Azure account.
- Create a new blob container for your website videos.
- Upload a new video into your container.
- Make sure the permissions are set so the public can view the video. This may require a little digging into the Azure settings, which are often controlled at the container level. It’s beyond the scope of this guide to dive too deeply in S3 permissions, but there are a lot of good tutorials online. In the screenshot below. I’m using the option, “Change access level”.
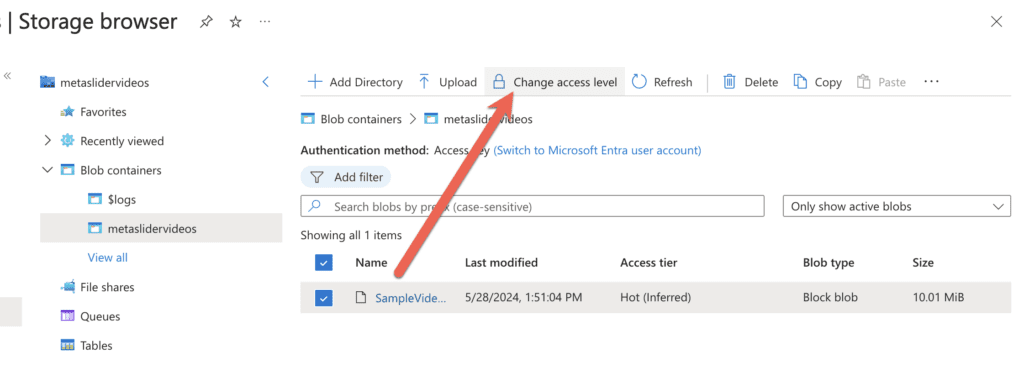
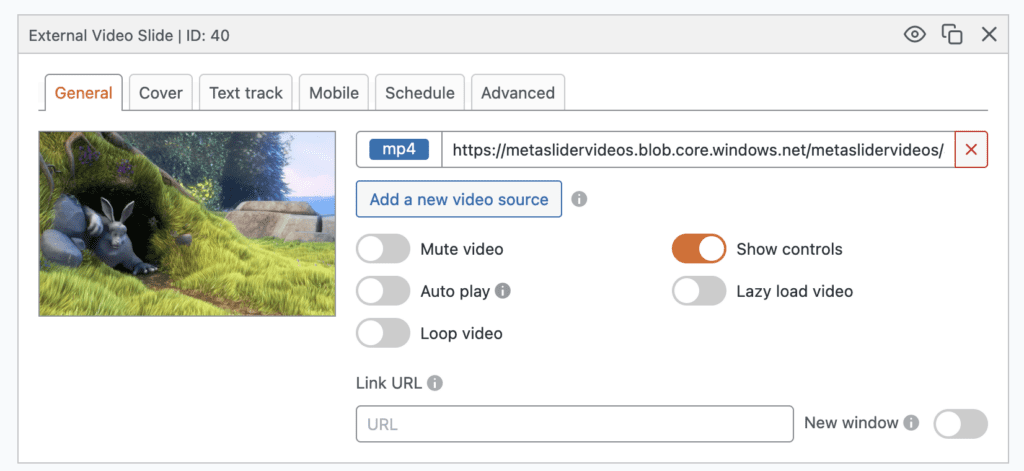
- Copy the URL of your video. The URL will look like this: https://youraccountname.blob.core.windows.net/yourfoldername/yourvideoname

- You can now add the Azure URL to your MetaSlider slideshow, as in this screenshot below:
Video Hosting Recommendation #4: Digital Ocean Spaces
Digital Ocean has a feature called Spaces Object Storage. The main advantage of Digital Ocean is the the friendly user interface. I found it much easier to use than Amazon S3, Google Cloud, or Azure. The main disadvantage is that it’s not entirely pay-as-you-go because you do need to pay a small, minimum monthly subscription for storage.
- Log in to your Digital Ocean account.
- Click on “Spaces Object Storage”.
- Click the “Create Spaces Bucket” button.
- Choose the settings and a name for your bucket.
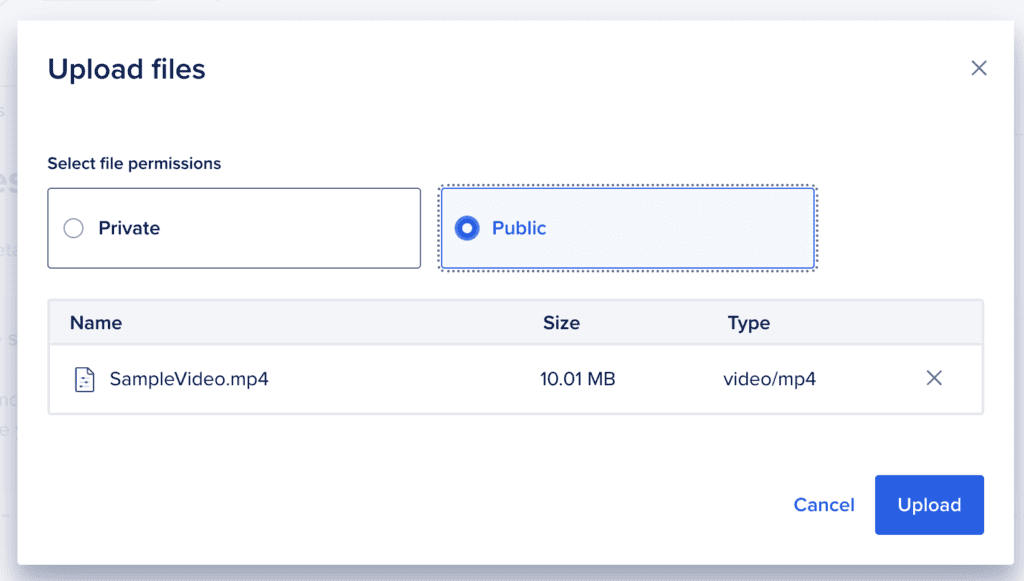
- Upload your video to your new bucket.
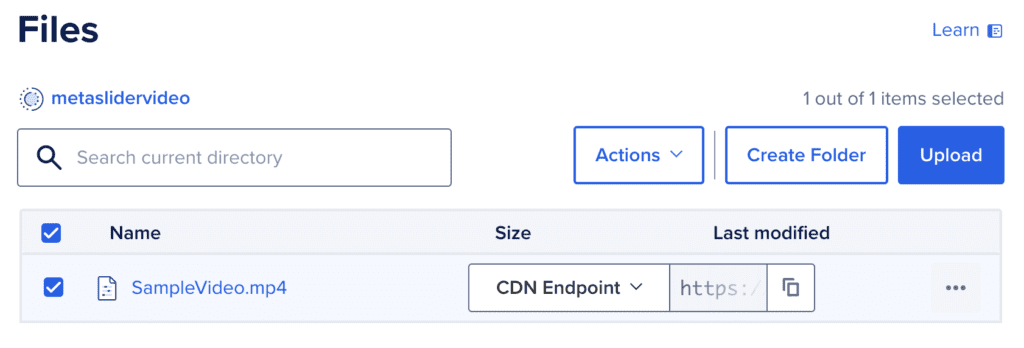
- Click the three dots at the end of the row that contains your video name.
- You will see a “CDN Endpoint” box. Take your video URL from this box. The URL will look like this: https://yourbucketname.nyc3.cdn.digitaloceanspaces.com/yourvideoname.
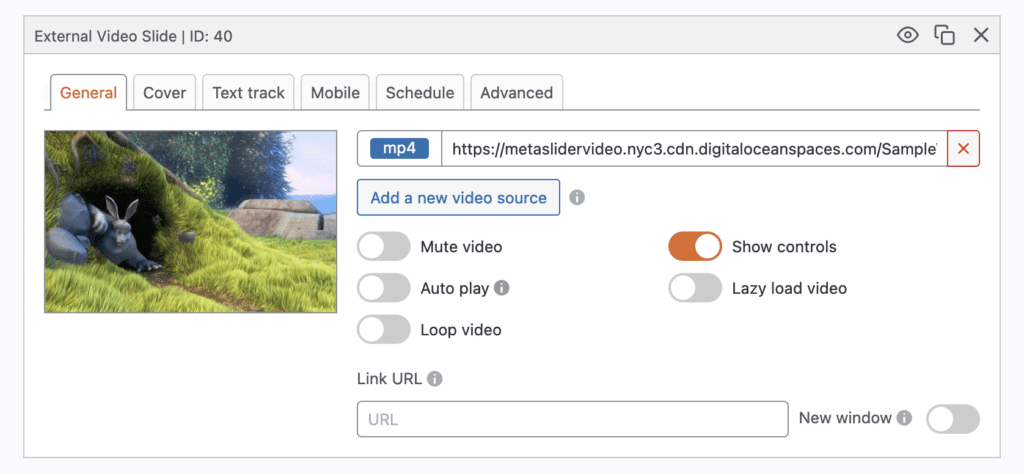
- You can now add the Digital Ocean URL to your MetaSlider slideshow, as in this screenshot below:
Errors with External Video Slides
It’s not unusual to see issues with videos hosted on external services. These services often have protections to stop other sites using their bandwidth. If this is happening with your video, you may see an error like the one in this screenshot below.

In your browser console, the error message may look like this next screenshot:

There are often errors related to CORS (cross-origin resources). If you see this problem, here are some suggested solutions:
- Check that the video URL is correct.
- You may need to talk with your video hosting company and check that your videos are publicly accessible.
- You may need to talk with your hosting company because they sometimes block external file access. You need access to these file types: mp4, webm, mov, vtt and txt. This can be done with a plugin. You can also talk with your hosting company to see if they can make changes to your site’s server configuration.
