This feature requires the MetaSlider Pro plugin.
MetaSlider can automatically create slides based on events in The Events Calendar plugin, displaying the featured image as the slide.
- Click here to see a demo of an Events Calendar slideshow.
- Click here for a longer guide to this integration with sample screenshots.
Here’s how to create an Events Calendar slideshow:
- Install MetaSlider Pro. We’re going to be using the “Post Feed” option in the Pro version.
- Install the Events Calendar plugin and create some events. Make sure to use the “Featured Image” field for each event.
- Go to “MetaSlider Pro” and create a new slideshow.
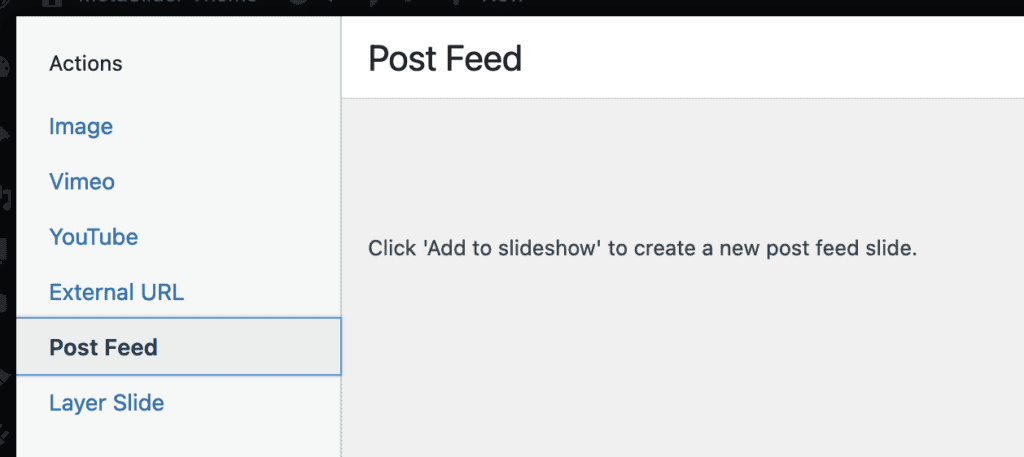
- Click “Add Slide”
- Choose the “Post Feed” option:
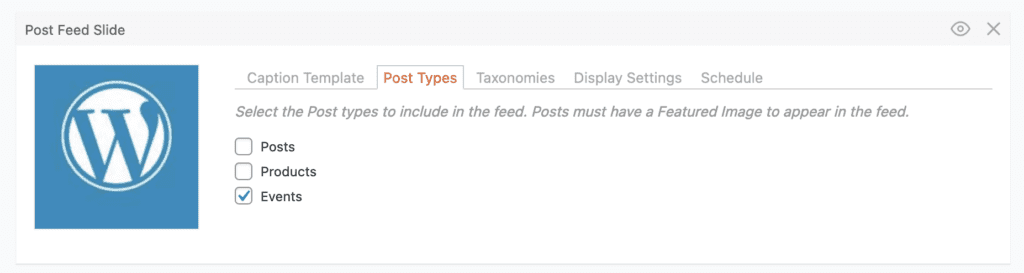
- Click the “Post Types” option.
- Choose the “Events” post type.
Go back to the “Caption Template” area. You can now decide what information shows on top of the featured image. In the demo site example, we’re using this code below:
<strong>{title}</strong>
<em>{event_start_date} - {event_end_date}</em>
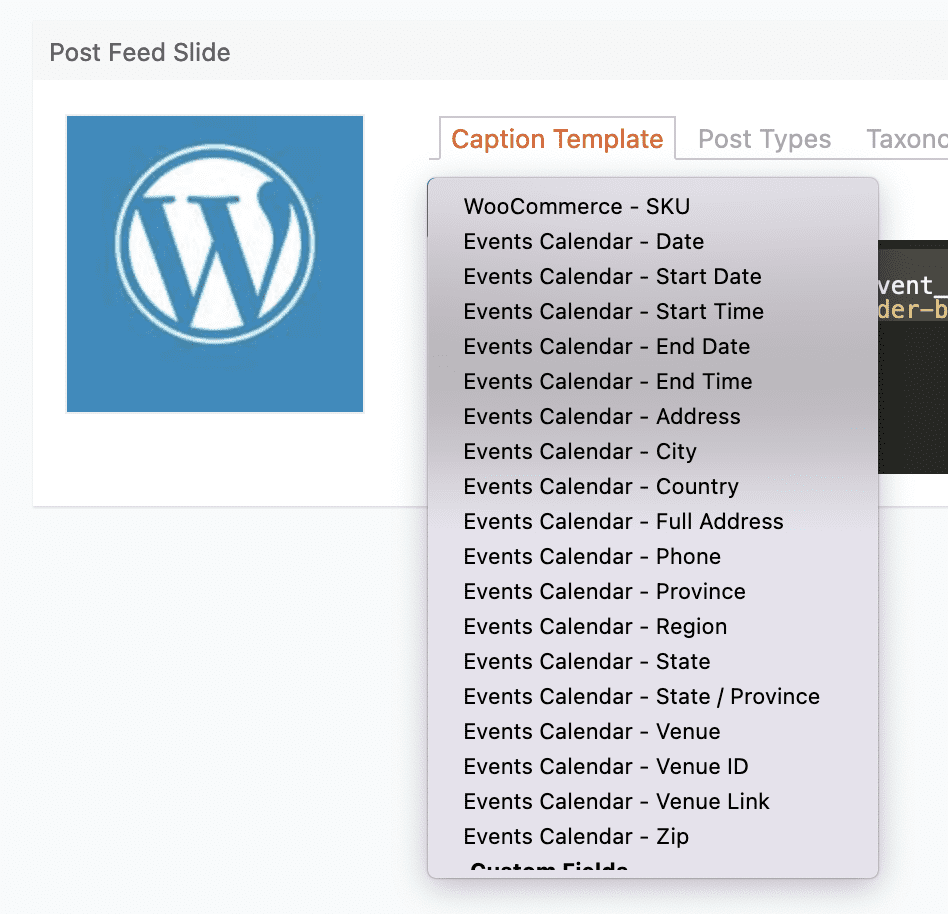
<a href='{link}' class='slider-button'>More Information</a>There are many more fields available to show from The Events Calendar. Here’s a full list of the options you can use:
- Date: {event_date}
- Start Date: {event_start_date}
- Start Time: {event_start_time}
- End Date: {event_start_date}
- End Time: {event_end_time}
- Address: {event_address}
- City: {event_city}
- Country: {event_country}
- Full Address: {event_full_address}
- Phone: {event_phone}
- Province: {event_province}
- Region: {event_region}
- State: {event_state}
- State / Province: {event_stateprovince}
- Venue: {event_venue}
- Venue ID: {event_venue_id}
- Venue Link: {event_venue_link}
- Zip: {event_zip}
These options are all available via the dropdown menu in the “Caption Template” option: