MetaSider is the most popular WordPress slider plugin and WPML is the most popular translation plugin. Together they are a great combination. WPML allows you to translate your slideshows created with the MetaSlider plugin.
Before starting this guide, make sure you have installed these plugins:
- The MetaSlider plugin
- The WPML core plugin
- The WPML String Translation plugin
- The WPML Media Translation add-ons
Step #1. Creating the Multilingual Slideshows #
First, we’re going to create a slider for your site’s language. In this example, we will use English as the primary language and Spanish as the secondary language.
First, we’ll create the English slideshow.
- From your admin menu, go to “MetaSlider” in your WordPress admin area.
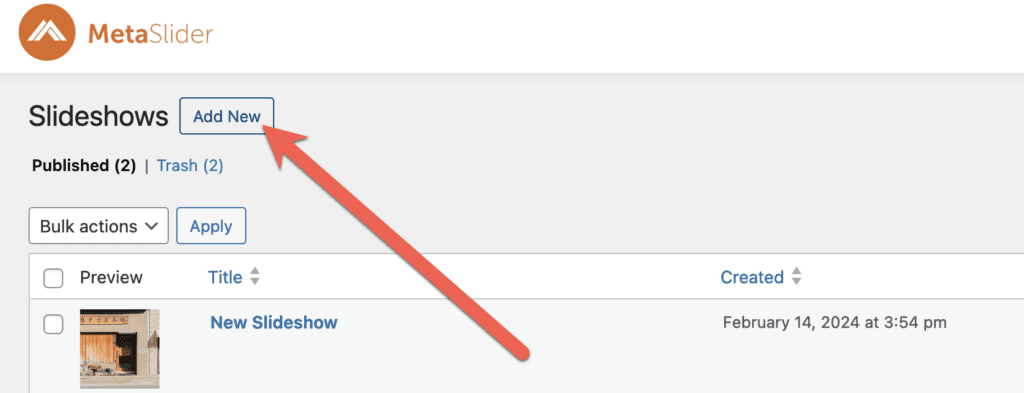
- Click the “Add New” button.
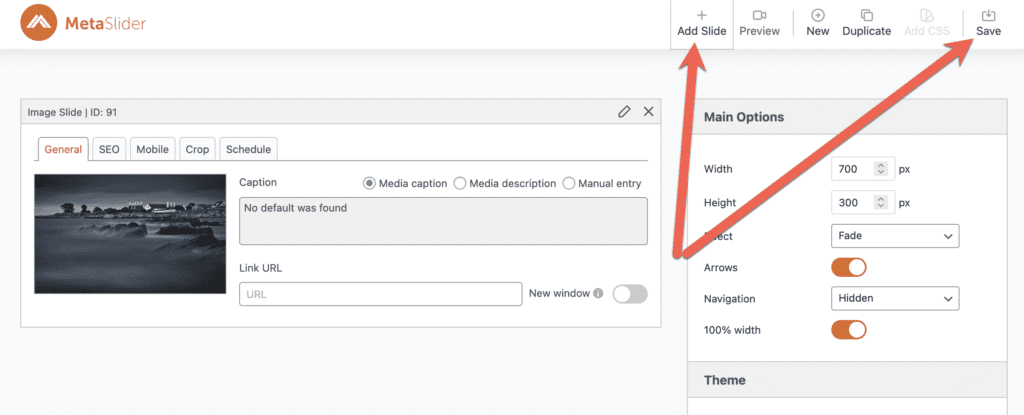
- Click the “Add Slide” button to add slides. You can choose between adding existing images from the Media Library or uploading new images.
- Configure your slideshow and click the “Save” button in the upper right-hand corner when you’re done.
Next, we’re going to create a slider for your secondary language. In this example, we will use Spanish.
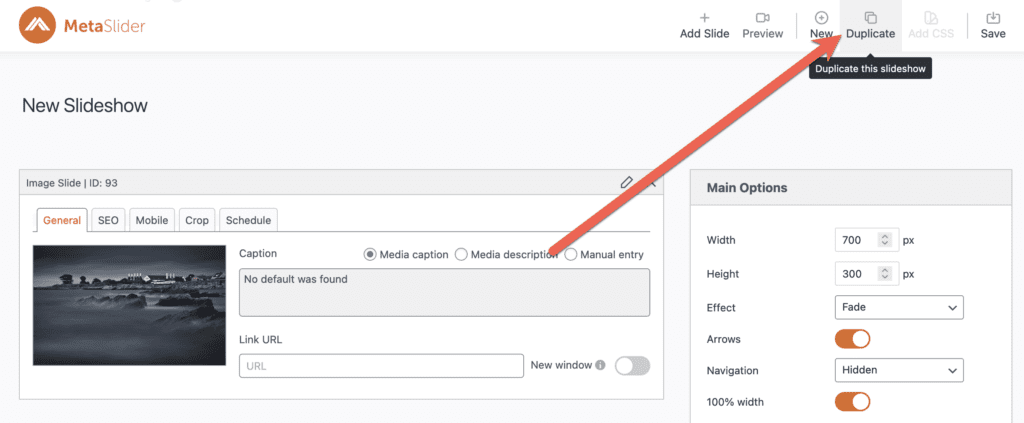
- Open your default language slider and click the “Duplicate” button.
- Once the page reloads, translate your slider name and image captions. You can also change images or slideshow settings for your secondary language.
- Click “Save” for your secondary language slider.
Now this is done, you will have one slideshow with names and captions in English, plus another slideshow with names and captions in Spanish.
Step #2. Add the Slideshows to Your Site #
In this step we will take your two slideshows and add them to your website.
- Edit a post of page.
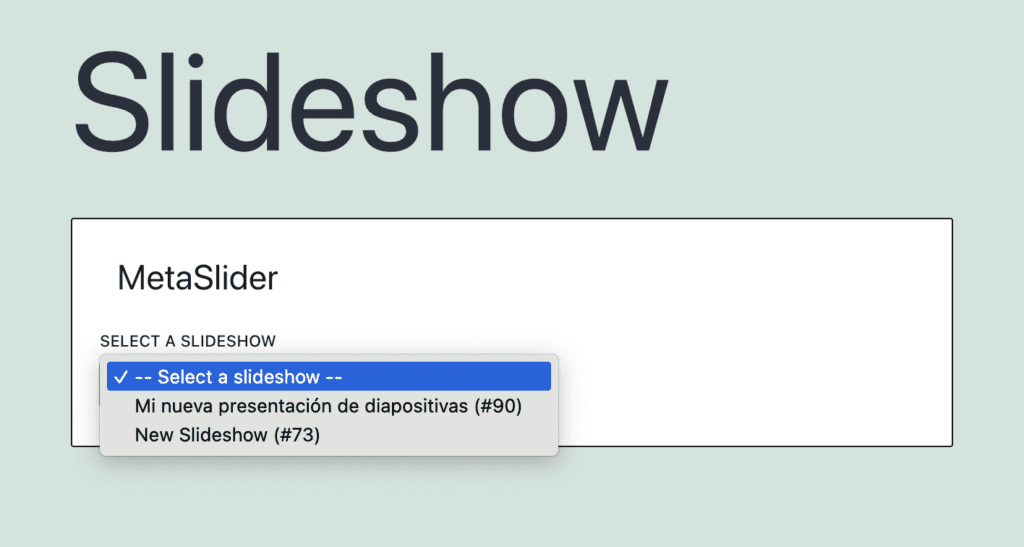
- If you’re using the block editor, add the MetaSlider block and choose the correct slider in your default language from the drop-down list.
- If you’re using the Classic Editor or a page-builder, use the MetaSlider shortcode.
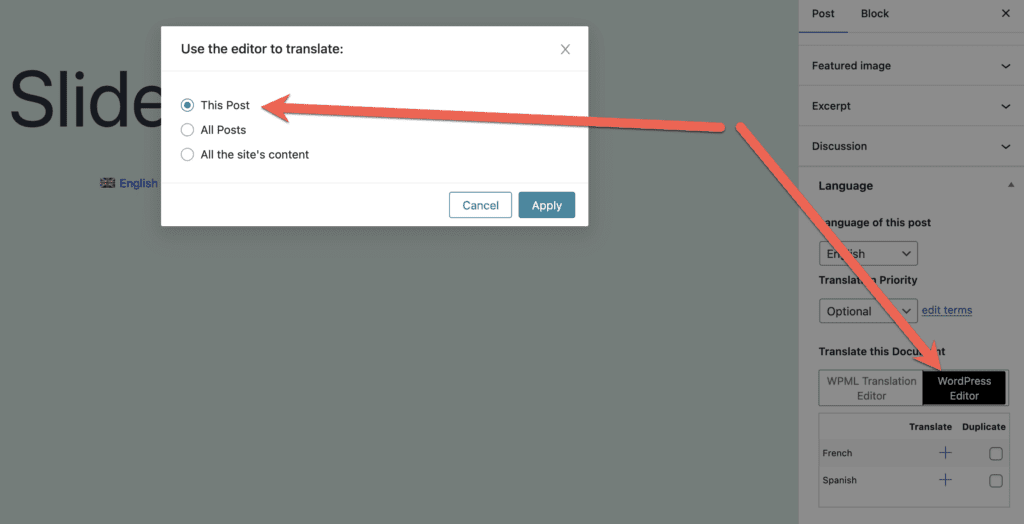
- From the “Language” box in the right sidebar, switch to using the WordPress Editor to translate the page content.
- In the pop-up that appears, confirm that you want to use the editor to translate this page.
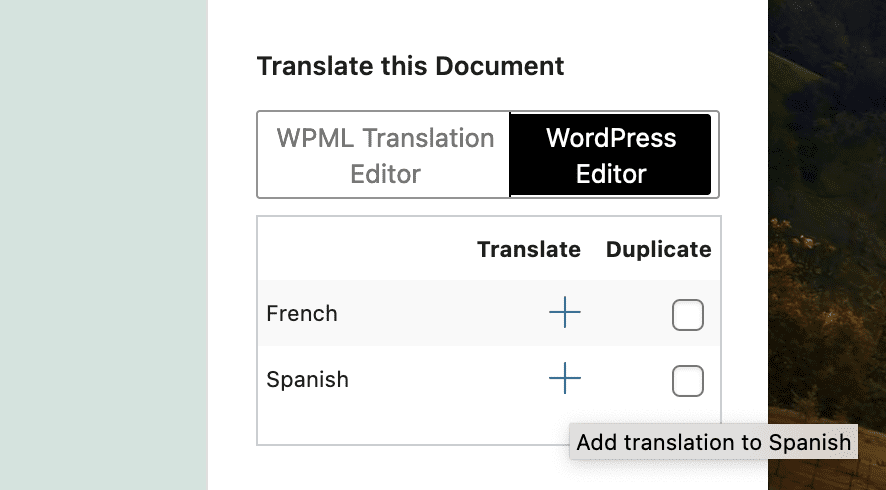
- In the sidebar, click the plus icon next to the language you want to translate the page into.
- Add the title and any other content you’d like to your secondary language page.
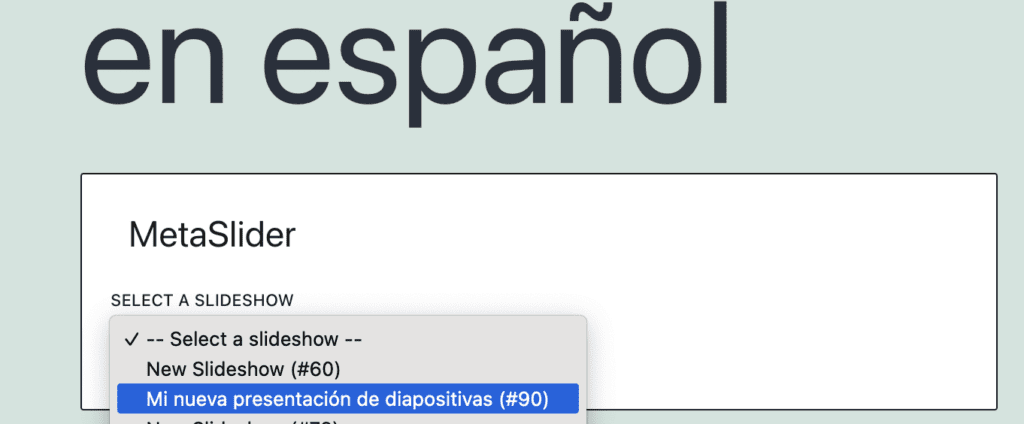
- Similarly as with your default language page, add the MetaSlider block. This time, choose the slider you created in your secondary language from the drop-down list.
- Click the Publish button to save the secondary language page.
- You can now view your posts with the slideshows on the front-end.
WPML and Text Inside MetaSlider Slides #
Our recommended method for building multilingual slideshows with WPML is explained above. However, in a couple of situations, users have asked if it’s possible to translate text inside a single slideshow.
If you do want to use this approach, you can follow these steps:
- Wrap the text you want to translate in the wpml-string shortcode. Here is an example of that shortcode: [wpml-string context=”New Slideshow” name=”first-string”][/wpml-string]. You can read about this shortcode in this article.
- Visit the slideshow on the frontend of your site. This will make sure the string is registered.
- The string will appear if you go back to the WordPress admin area and visit “WPML”, then “String Translation”.
- In the example above, the string will be under the domain New Slideshow and name first-string.
