You can use the MetaSlider Gallery plugin to show images inside a gallery window.
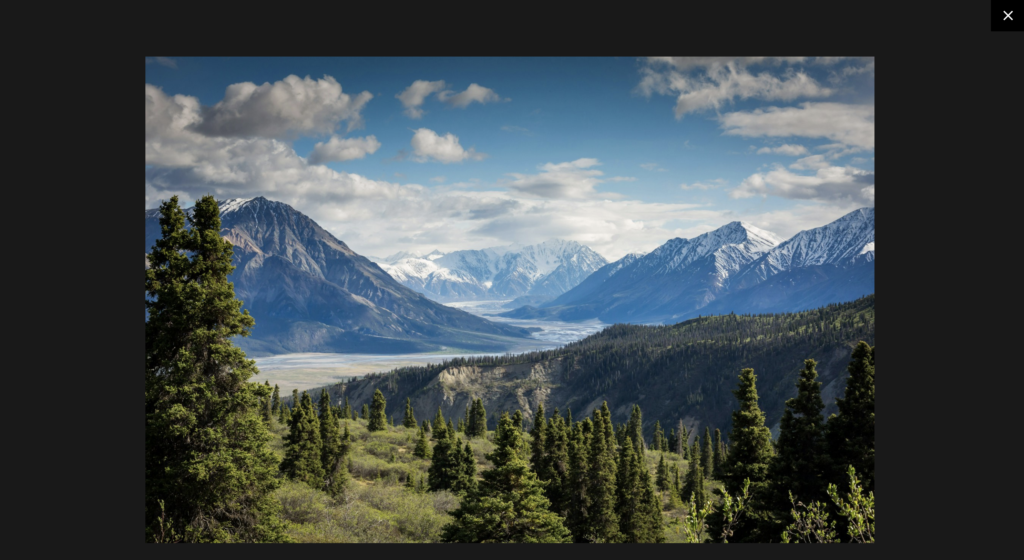
Using MetaSlider Gallery, your media will be shown in a gallery window that looks like this screenshot below. In fact, you can click on button in the top-right corner to get a live demo of how this works.
How to Apply the Gallery Automatically #
It is possible to apply the MetaSlider Gallery features automatically to your image. You’ll find this setting under the “Automatic Mode” tab in the plugin. Enable the setting labeled “Images in post content”.
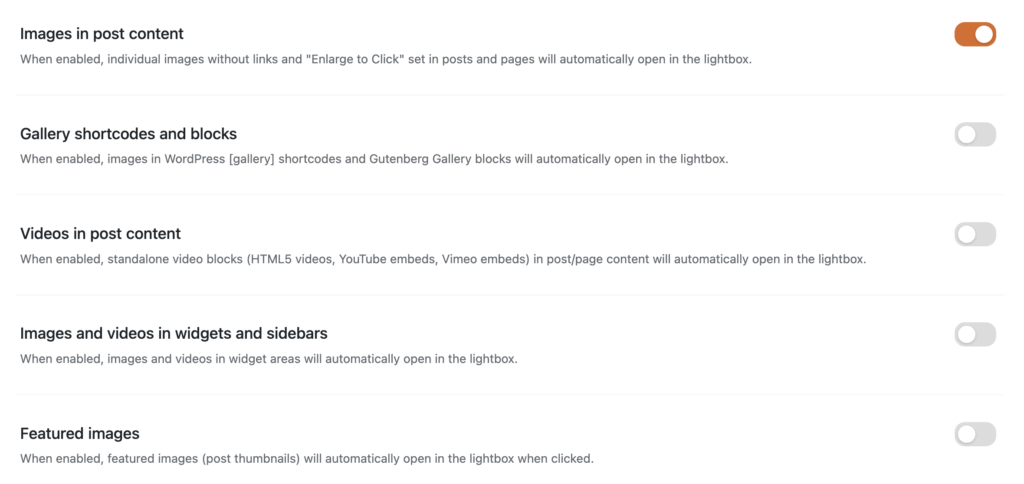
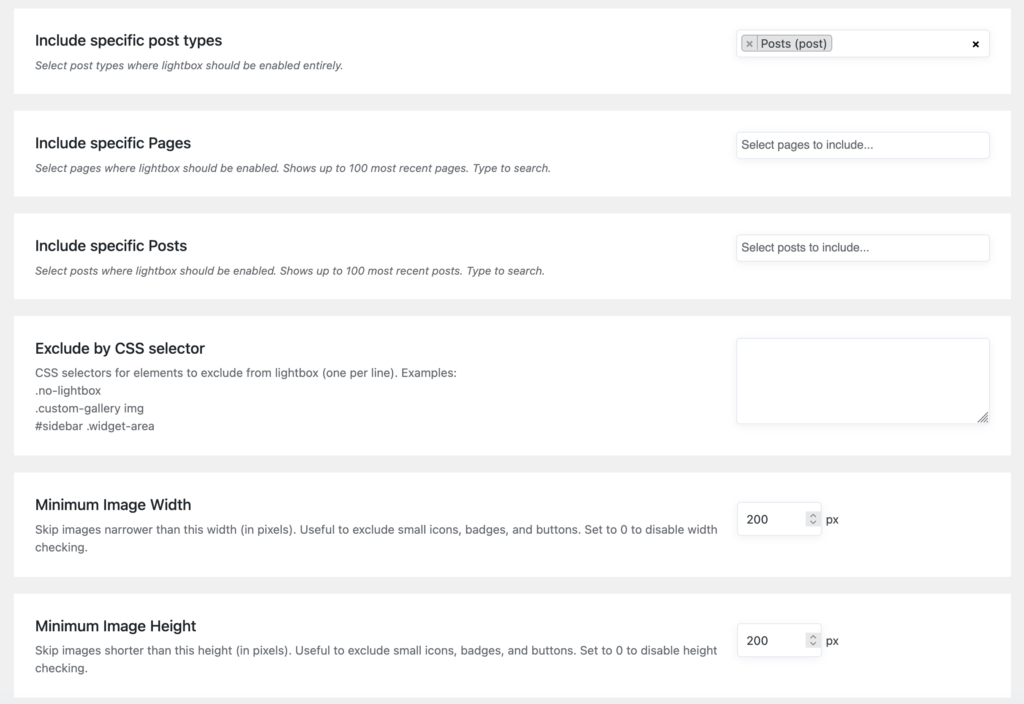
It’s possible to filter this automatic settings further using the “Content Filtering” settings:
- Processing Mode: You can choose either “Inclusion Mode” or “Exclusion Mode”.
- Include / exclude specific post types
- Include / exclude specific Post, Pages or other post types
- Exclude by CSS selector
- Minimum Image Width and Minimum Image Height
How to Apply the Gallery Manually #
Be default, the WordPress core provides a basic lightbox / gallery window option. It’s possible to override this default setting with the MetaSlider Gallery plugin. You’ll find these options under the “Manual Mode” tab.
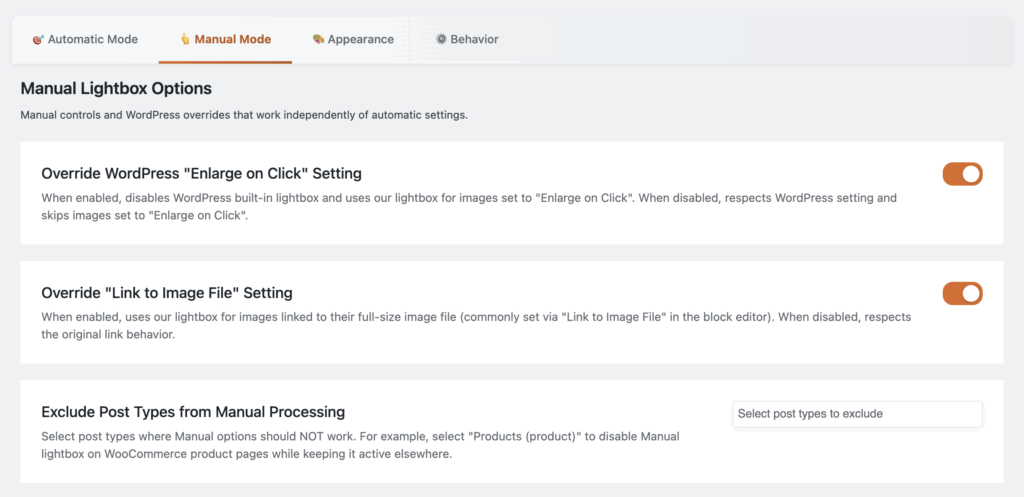
The default WordPress feature is called “Enlarge on Click”. Here’s how to enable it and to add MetaSlider Gallery to an image.
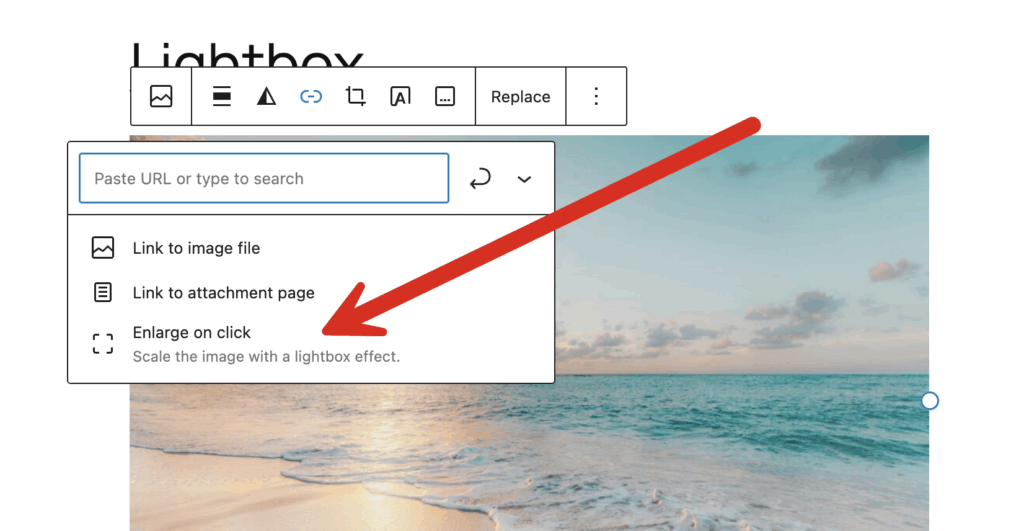
- Select an image in the block editor.
- In the block settings, look for the link icon.
- Choose “Enlarge on click”.
- Now when a user clicks on this image, it will open up in a modal provided by the MetaSlider Gallery plugin.
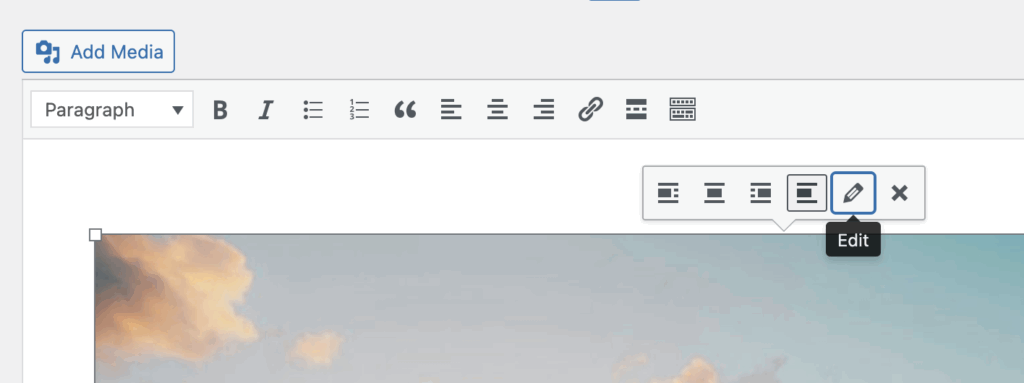
It’s also possible to apply MetaSlider Gallery using the Classic Editor in WordPress. Look for the pencil icon to edit settings for your image, as in this screenshot below.
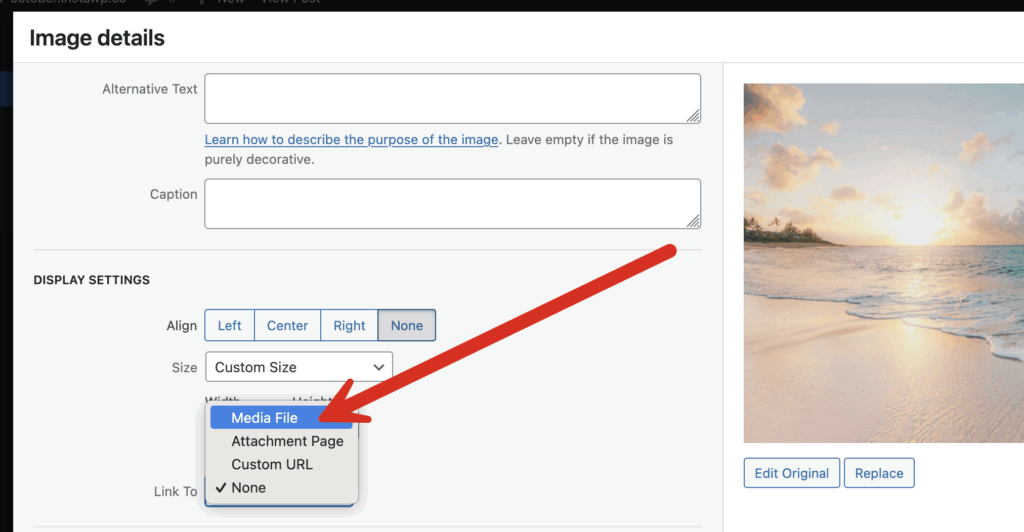
- Choose “Media File” for the “Link To” option as in this next screenshot:
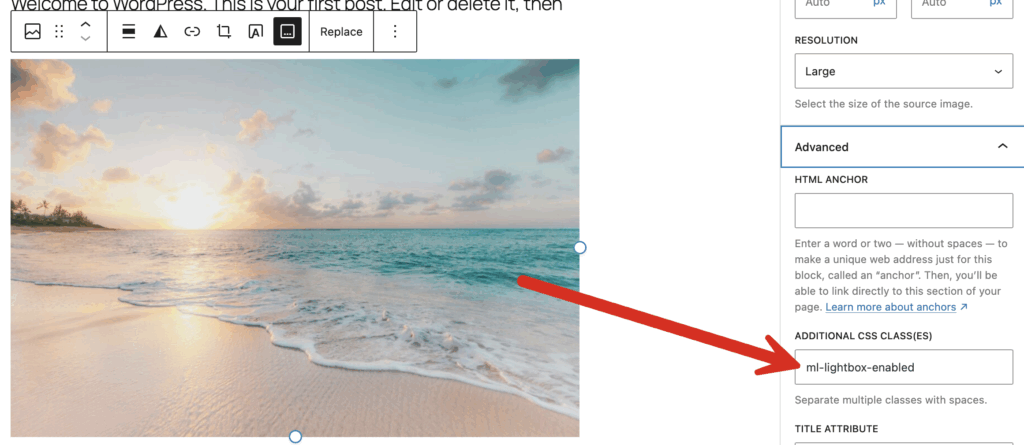
How to Apply the Gallery With CSS #
It’s also possible to add MetaSlider Gallery to image, video or gallery block using CSS.
- Select an image or gallery block.
- In the block settings sidebar, scroll to “Advanced”
- Add
ml-lightbox-enabledto “Additional CSS class(es)” as in this screenshot below: