
Table of Contents
This feature requires the MetaSlider Pro plugin.
Layer Slides are included in MetaSlider Pro.
Layer Slides allow you to add elements on top of an image or video.
You can add text, colors, shortcodes, animations and even other images or videos on top of your first image or video.
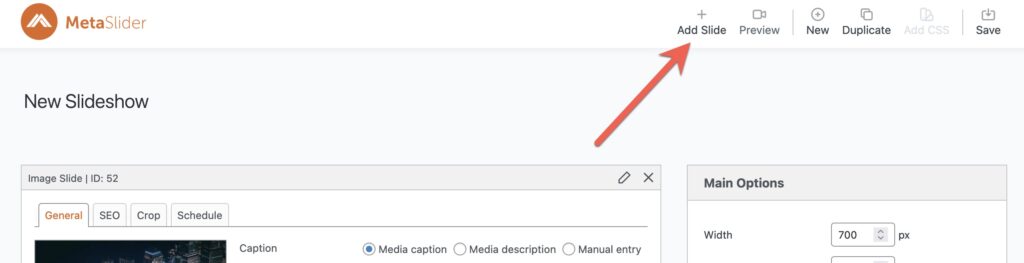
Add a new Layer Slide to your slideshow #
- Click the “Add Slide” button to launch the Media Manager.
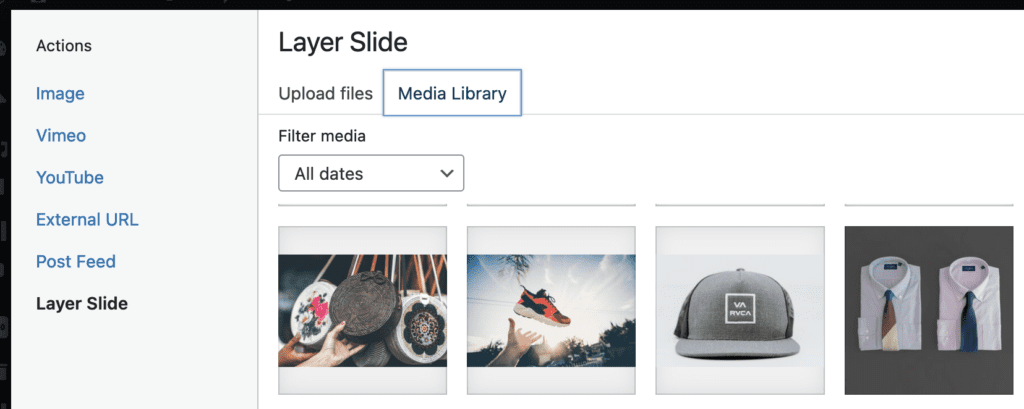
- In the left menu of the Media Manager, select “Layer Slide”.
- From here you can select a background image for the slide, or upload a new image.
- Click the “Add to slideshow” button.
- The Media Manager will close and a Layer Slide will be added to your slideshow.
How to use the Layer Editor #
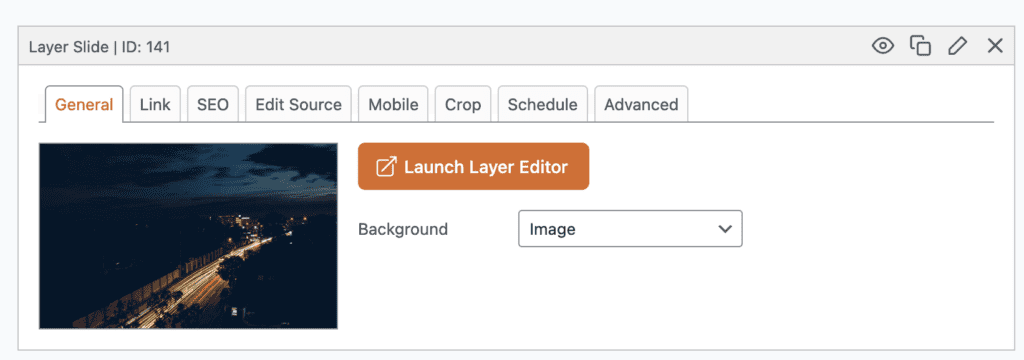
- Use the “Background” option to choose between using a background image or video.
- Click the “Launch Layer Editor” button to open the layer editor screen.
- Click the “New Layer” button located at the top left of the editor to add a new layer.
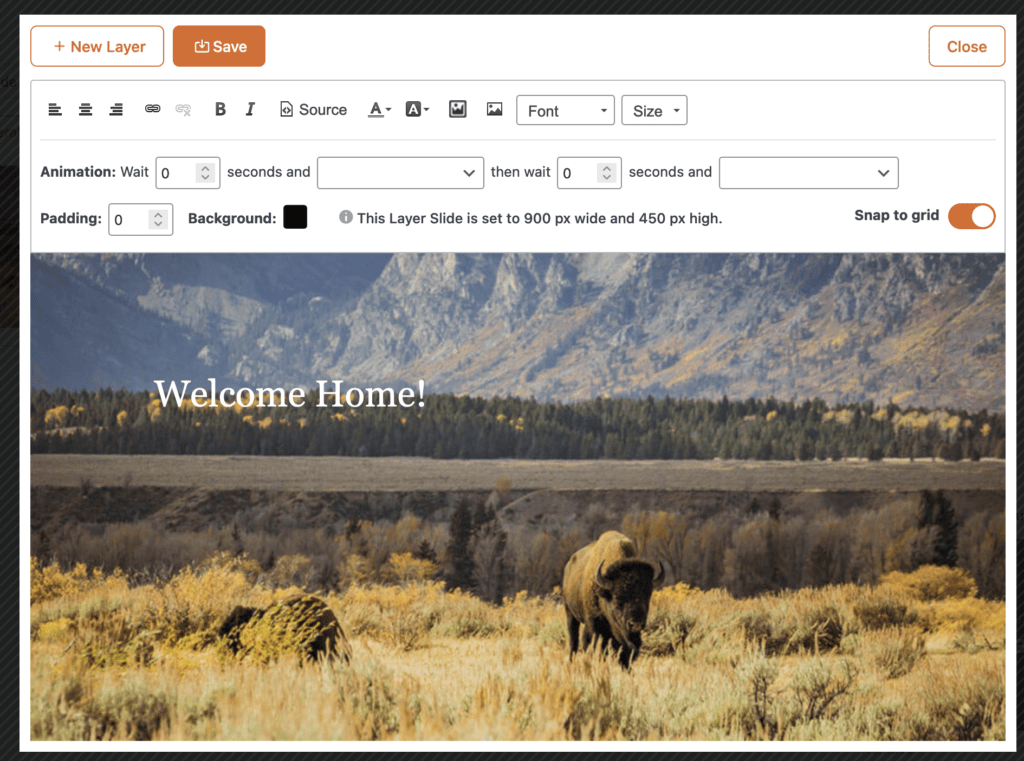
Layers can include plain text, formatted text, HTML, images, videos, and even shortcodes. Use the buttons in the main toolbar to add any element you need.

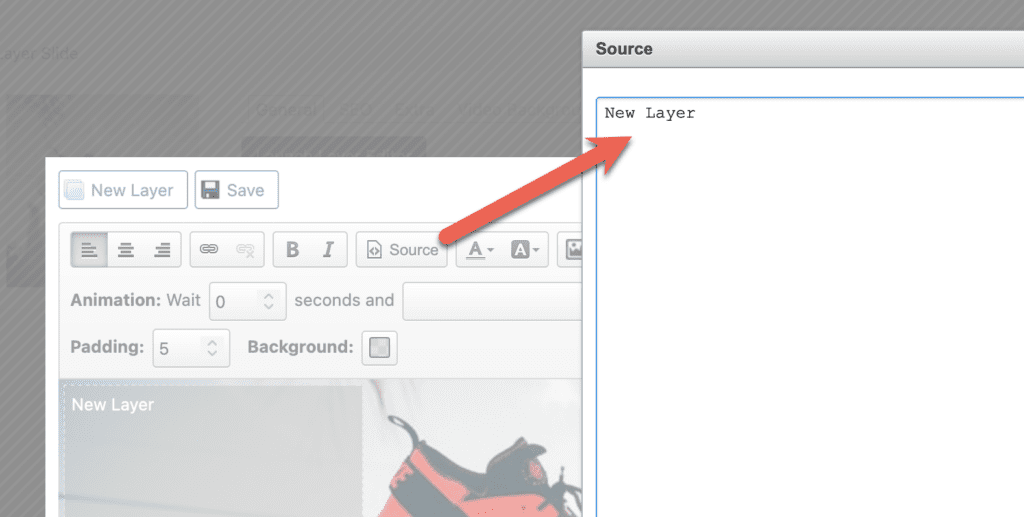
Advanced users can take advantage of the “Source” button to edit the HTML of each layer directly.
You can adjust the padding and background color of each layer by using the options located on the bottom row of the toolbar.
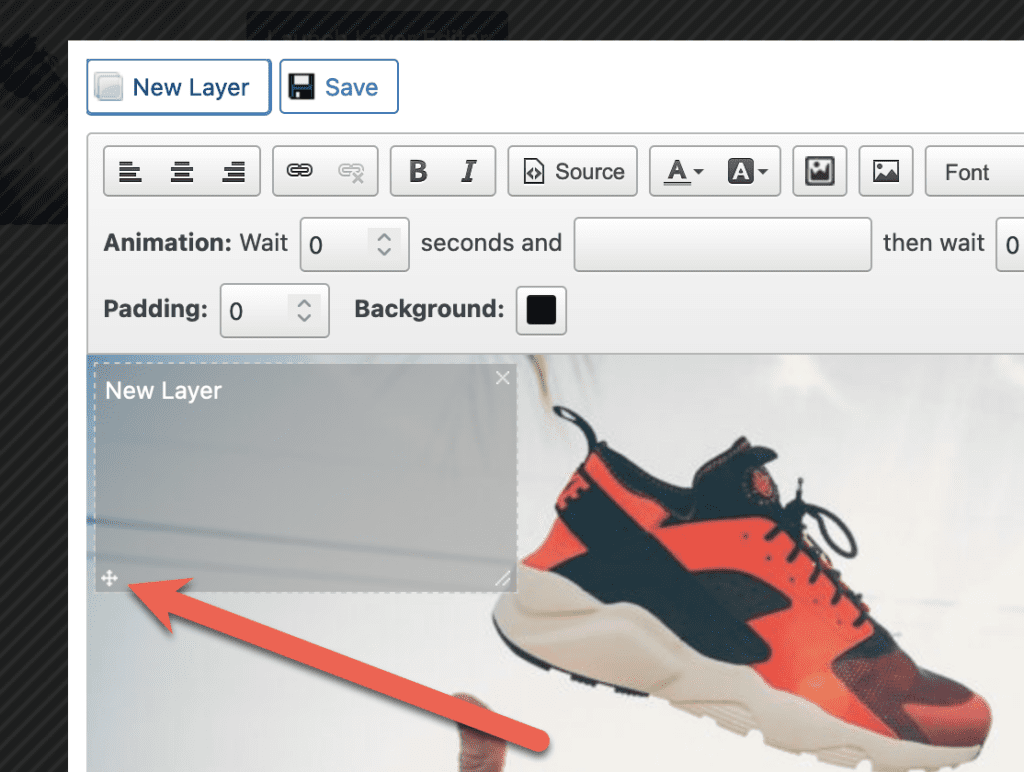
- To reposition a layer, use the drag and drop handle located at the bottom left of the layer.
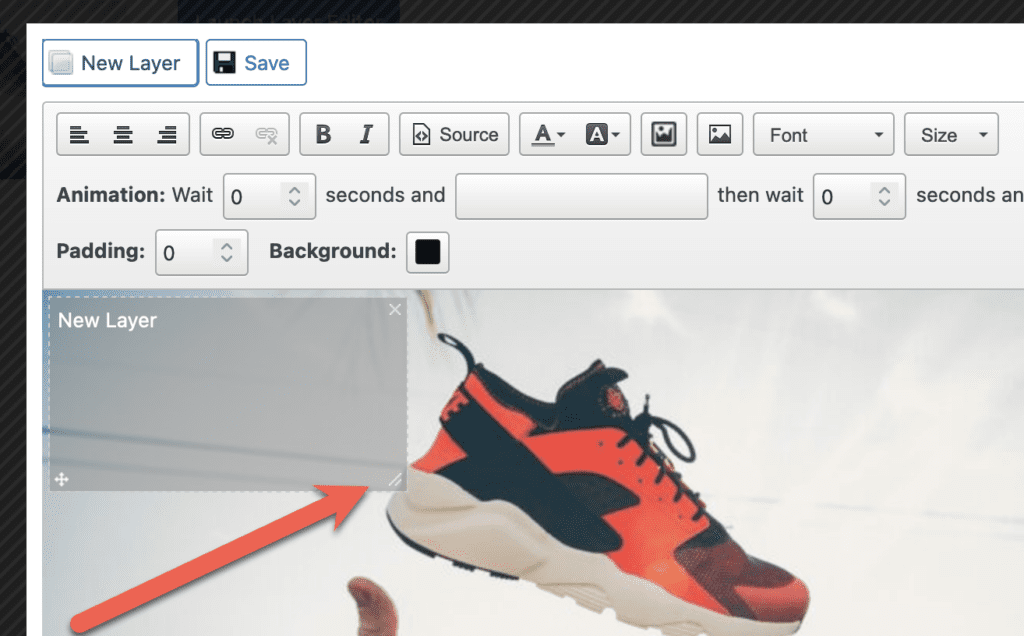
- To resize a layer, use the resize handle located at the bottom right of the layer.
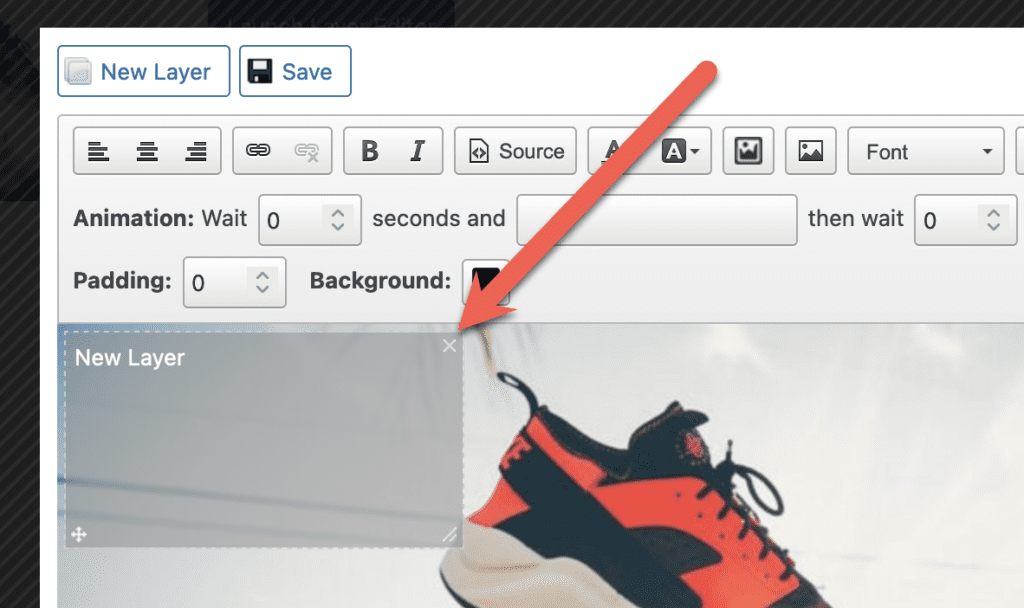
- To delete a layer, click the delete icon located in the top right of the layer.
Tips and tricks for using Layer Slides #
- The preview does not load your themes stylesheet. There may be differences between what you see in the preview and what you see when you embed the slideshow into your site. If layers are working in the preview, but not on your site, then it means there is a CSS conflict coming from your theme or other plugins. If you need help tracking down and fixing the conflict down please get in touch.
- If you’re editing the Layer HTML Source manually, be sure to specify your font sizes and line heights in ‘em’ units. This ensures your layers will scale responsively.